Wednesday, April 29, 2009

A Granny Square a Day 'Til the End of May

Over at Meet Me At Mike's a challenge was issued a few weeks ago to make a Granny Square a Day 'Til the End of May. I only just found out about it yesterday, what with moving and all, but decided this was a perfect chance to use up some of my yarn which seems to have been breeding while I had it packed away in those dark, cozy boxes. Who knew?
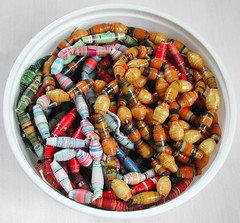
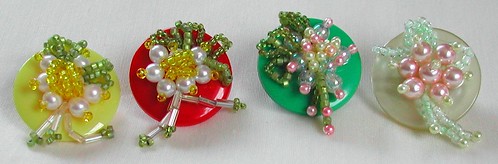
Anyway, I had recently seen this pattern over at Crochet Me and when I saw the challenge and all that yarn I just had to join in the fun. Of course, I am playing catch-up so here are my first four:
Swirily Granny Squares
I started with the one in the upper left and then changed just one color as a did each one after that (they go clockwise). I will see how far I can go using up bits and pieces of yarn before I have to change more than one color at a time. It isn't meant to be a hard and fast rule, just something I made up.
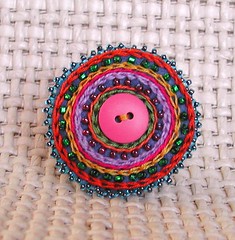
I left the ends long because I am not sure if I want to sew them together as is, which would require a lot of different colors of yarn, conveniently already attached, of if I want to add a neutral border and then attach them. We'll see.

Unpacking

When you unpack after a move you have to look at the things you have had around you for a while and rethink what you are going to do with them and where they will go if you do decide to keep them. Sometimes it just takes that new setting to see something that has been there for a while.
I found a little margarine tub (how long has it been since I even bought margarine in a little tub like this?) in with all my beads. This is what was inside:
Tub o' Paper Beads
I remember making them about 5 or 6 years ago. The goldish colored ones were varnished with something that gave them a bit of an yellow tone which looks lovely on those beads, but I decided not to try it on most of the colors. Here are a few of the strands of beads:
Strands of Paper Beads
I also found these pins that I made a while ago. My mom had given me a kit for the yellow one. She had gotten it from a group she belongs to. I used leftovers from that kit and some of my own supplies to make the rest. Basically, you just keep going in and out of the holes on a four hole button, picking up various combinations of beads whenever you are on the front side. Fasten off and glue a pin back to the back.
Button Pins

Tuesday, April 28, 2009

We're Getting Settled

We moved into our house last week, because that is when escrow finally closed. We had been expecting it to close about a week and a half before that and so things were getting quite tense for a while there.
Now we are starting to get rooms into the shape and there are less and less boxes lying around the house. Ken has done so much work. He is amazing.
Yes, I should have pictures to share with you, though I am sure you do not want to see the dead mouse I found floating in the pool yesterday. No one told me that was part of owning a pool. All I know now is that we need more chlorine, no matter what the actual chemical balance of the water may suggest. We need more chlorine.
I also will not put up a picture of the lady who keeps parking in front of our driveway and saying she didn't know that someone was living here now, no matter how often we tell her. Sheesh.
So, because I don't want to go through a month without posting something and because I like posts that have pictures, let me share this with you:
Embroidered Felt Pin
This is a pin I made from a pattern in the book Doodle Stitching. I used beads instead of the french knots the pattern called for. My version is also stitched on felt so I didn't have to turn under the edges.
Doodle Stitching is also the inspiration for this pin also stitched on felt.
Embroidered Felt Pin
Hope you enjoy them.